Google Search Console (GSC) is an essential tool for any website owner or developer. It provides insights into how your website is performing in Google Search, alerts you to potential issues, and offers tools to improve your site's visibility. If you're managing a website through Development Bucket, this guide will walk you through the entire process of setting up Google Search Console, including the specific steps required within the Development Bucket admin panel.
Whether you're a beginner or experienced webmaster, this post will break down every step to ensure your website appears optimized and ready for search engines.
What Is Google Search Console, and Why Is It Important?
Google Search Console is a free tool provided by Google to help website owners monitor and maintain their website's presence in search results. Here's why it matters:
- Search Performance Monitoring: Check what keywords drive traffic to your website and which pages perform best.
- Indexing Issues: Identify and fix errors that may prevent Google from indexing your site.
- User Experience Improvements: Get insights into mobile usability issues and page experience factors.
- Security Alerts: Receive notifications about potential security concerns like malware attacks.
If you're serious about growing your online presence, setting up Google Search Console should be one of your top priorities.
Key Benefits:
- Monitor your site's search traffic and performance.
- Identify technical issues and fix them promptly.
- Enhance the user experience to increase organic search ranking.
- Stay on top of security vulnerabilities.
Now that you understand its importance, let's jump into the step-by-step instructions for setting up Google Search Console.
Step-by-Step Guide to Set Up Google Search Console
Step 1: Sign in to Google Search Console
- Go to the Google Search Console website.
- Log in using your existing Google account. If you don’t have one, create a new free account.
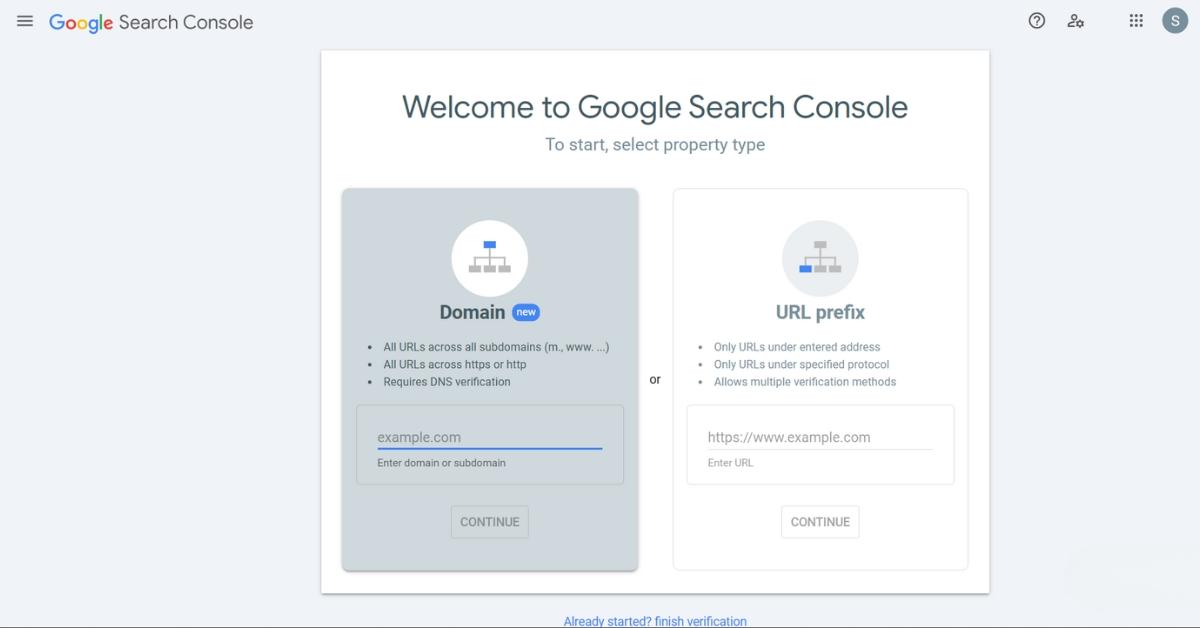
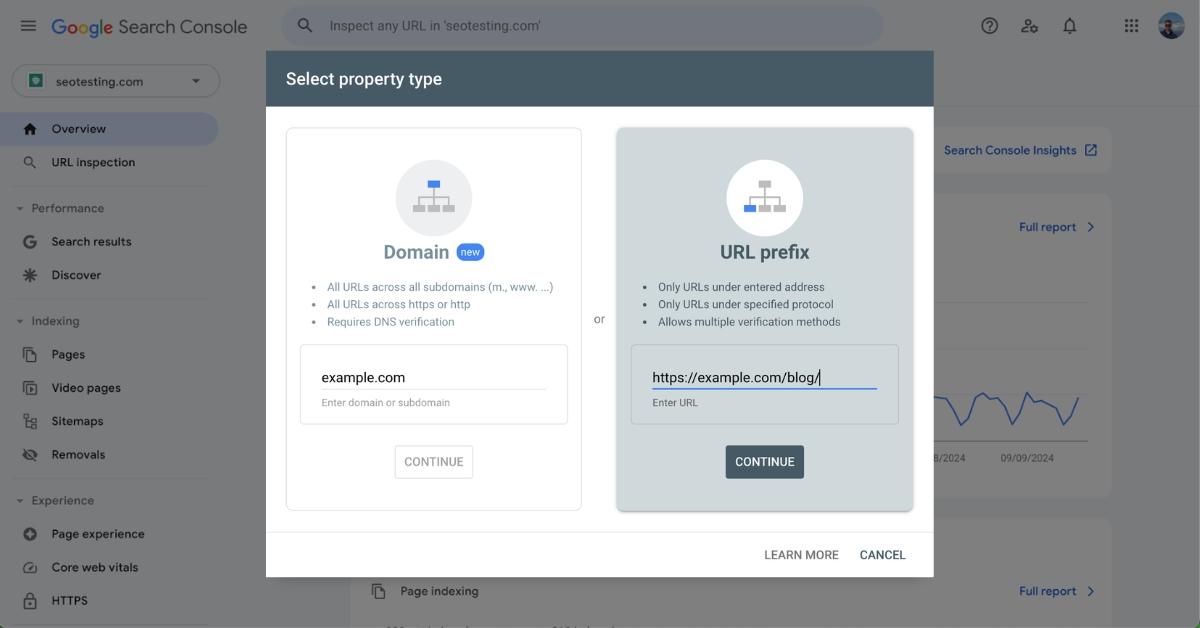
Step 2: Add Your Domain or URL Prefix
- Once logged in, you’ll be prompted to add a property.
- You’ll see two options:
- Domain (recommended): Covers all URLs under your domain name (e.g., example.com).
- URL Prefix: Covers only URLs under a specific prefix (e.g., https://example.com/blog/).
- Enter your domain or URL prefix in the appropriate field and click "Continue."
Step 3: Verify Ownership of Your Website
Google verifies you're the owner of the website to prevent unauthorized access. It offers various methods:
-
HTML File Upload (Recommended):
- Download a verification file provided by Google.
- Upload it to your website's root directory.
-
HTML Meta Tag:
- Copy the meta tag provided by Google (you'll use this method specifically for Development Bucket).
-
Other Methods:
- DNS verification through your domain host.
- Google Analytics account if already linked.
For Development Bucket users, follow the steps in the next section to implement the HTML meta tag.
Step 4: Complete Setup in Development Bucket Admin Panel
If your site is managed through Development Bucket, integrating GSC involves a few extra steps within the platform’s admin panel.
-
Access the Settings Panel:
- Log in to your Development Bucket account.
- Navigate to your website's Admin Dashboard.
- On the left-hand menu, select Settings (4th option from the top).

-
Go to Advanced Settings:
- A new page will open. Here, click on Advanced (Additional Settings), which is typically the 5th option in the menu.
-
Paste the HTML Code in Custom Head Tags:
- Under Advanced Settings, locate the section titled Custom Head Tags.
- Paste the HTML meta tag code copied from Google Search Console here.
-
Save and Apply Changes:
- Once pasted, click on "Save" or "Update" depending on the interface.
- The meta tag will automatically update on your website’s header.
-
Return to Google Search Console and click Verify to complete the setup.
Step 5: Submit Your Sitemap (Optional but Recommended)
- Go to the Google Search Console Dashboard.
- Under Indexing, click Sitemaps.
- Enter the URL of your sitemap (e.g., https://example.com/sitemap.xml) and click "Submit."
Submitting your sitemap helps Google crawl and index your site more efficiently.
Common Errors and Tips
- Verification Failed? Double-check that the meta tag code was correctly pasted and saved in Development Bucket’s admin panel.
- New Content Not Showing in Search Results? Allow Google some time to crawl and index your site. Use the "URL Inspection" tool in GSC for faster processing.
- Need Help? Both Google Search Console’s Help Center and Development Bucket Support can provide assistance.
Wrapping Up
Integrating Google Search Console into your workflow, especially with Development Bucket, is a straightforward process that pays dividends in the long run. By regularly monitoring your site’s performance and resolving issues as they arise, you can boost your visibility, enhance the user experience, and ultimately drive more traffic to your site.
If you haven’t already added Google Search Console to your toolkit, now is the time to take that step. Happy optimizing!